Thursday, November 12, 2020
Tuesday, November 10, 2020
TUTORIAL: Flat borders
I often see quilts that have borders that do not lay flat. This can happen by sewing on a border without first measuring the correct length.
Here I will show you how I remove the extra fabric, and then finish the quilt so it will lay flat & square.
If you haven't applied the borders yet, and want to see how to apply the correctly the first time, just scroll down a bit.
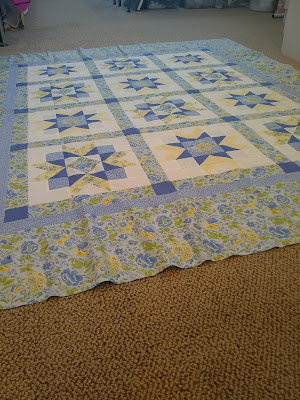
Here you can see how the body of the quilt is nice & flat, but the borders look wavy. Laying your quilt out on a flat area will give you a good idea of how flat your borders are looking.
I begin by removing the borders with a seam ripper. Here you can see I needed to take off the two outer borders on this quilt.
Now we will start re-applying the borders. I am starting with the first two narrow borders.
🌟(If you are apply the borders for the first time, start here!)🌟
Lay them on the middle of the quilt, to see how long they need to be to keep the quilt square.
This picture shows how much extra fabric needs to be removed. Cut these two borders at the same size as the body of the quilt.
Now repeat that process with the top & bottom borders. Lay across the body of the quilt, trim to match, and pin in place to re-apply.


