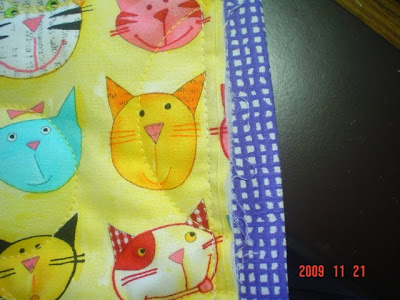
Ok, now you should have 2 loose ends. You'll need about 8-12 inches (or more) free on both ends.
Bring together the pieces, and then fold them back on themselves. Leave about an 1/8" gap where the 2 binding pieces meet. I've found this is neccesary becauase the 2 pieces will be joined on the bias, and there is a tiny amount of stretch. If you leave the small gap now, the length of the joined pieces should be just right. Without the gap, the binding usually ends up a smidge too long.

Now measure 1 1/4" from the fold, and cut to that length.
(If you are using a different width binding, use half of the total width for a measurement to trim each side. For example, if you start off with a 2" wide binding, now you should be cutting each end to 1" long.)

Now the ends should look like this:

Open up the ends, and lay them out as shown here. Position the right side piece on top of the left side piece, matching corner "A" to corner "B".

Pin together, and sew on the diagonal (shown in red). You may have to squish up the quilt a bit at this point to get the part you're going to sew to lay flat in the sewing machine.

Trim off the triangle, leaving a 1/4 seam.

Press the seam open. I run my fingernail along the seam, or you can use your iron.

Now you should be able to lay the quilt flat again, and it should look like this. A nearly invisible diagonal seam, that looks just like all the others. Take this back to your sewing machine, and finish up the rest of the binding.

Starting in the middle of one side of the quilt, you are going to wrap the binding around to the front side, placing the edge of the binding just to the left of the line of stitching you just made.


Holding down a small section at a time with your hand, sew very closely to the edge of the binding. If you take your time and use matching thread, this will come out very nicely.


Continue down the side of the quilt until you get about 3" away from the corner. Leave the needle down, and trim off the tiny triangle shown here.

Here it is trimmed. Be careful to only trim the tiny point that is to the right of the stitching line. This will eliminate some bulk at the corner. If you trim too much, you will be left with a hole in your binding. It's just that tiny corner- it will be about a 1/4" size piece getting cut off.

Now, with your needle still down, position the binding past the corner, and then hold in place the binding above the corner. It should form a nice miter.
This is how your corner should look. Continue sewing down the binding, using this method when you come to each corner.

And here is a view of the back. Your top stitching should be just past the edge of the binding on the back side of the quilt. Again, with matching thread, this is going to blend in well, and not be very noticeable at all.

A view of both sides of the completed binding.

Yeah, you're done!
Once you get the hang of it, this really does go fast. Really. It took me less time to actually put the binding on this quilt than it did to explain how to do it. I hope you'll give this method a try! I'd love to hear how it turns out for you. And, please leave a comment if there's something that's not clear & I need to explain better.


3 comments:
1805Works wonderfully! Thanks so much for your help!
Thanks for this awesome explanation. . .it turned out marvelously Kristin!
I've made several quilts and I always, always open up this tutorial when I'm doing my binding just to make sure I'm doing it right! Kristin's binding technique is easy to follow on this tutorial, and it looks great every time. Thanks, Kristin, for all your quilting tips!
Post a Comment